Table of Contents
Ever looked at a kettlebell and thought, "I could probably lift that... maybe?" You're not alone. Many beginners find kettlebells intimidating, but they’re actually awesome tools for building strength and burning calories. This article is your no-nonsense guide to a basic kettlebell workout for beginners. We'll skip the fancy jargon and get straight to the good stuff. We'll start with how to actually hold the thing (it's not as obvious as it looks). Then, I'll show you six simple but effective exercises perfect for beginners. We will also discuss what kind of kettlebell you should use and how much it should weigh. Finally, we'll piece it all together into a 20-minute routine you can do at home or at the gym. Ready to swing into action? Let's go.
How to Hold a Kettlebell for Beginners
How to Hold a Kettlebell for Beginners
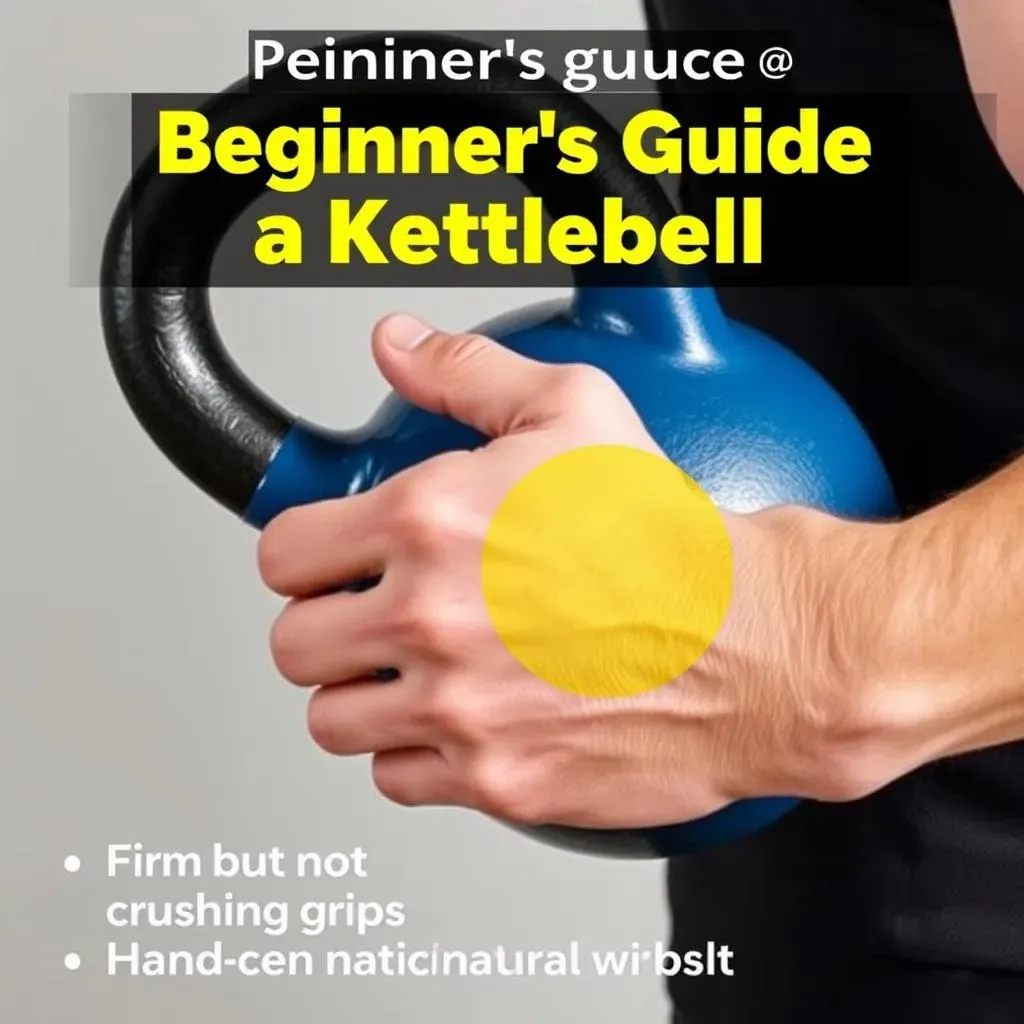
The Grip: It's All About the Handle
Okay, so you've got a kettlebell, it looks kinda like a bowling ball with a handle, right? But unlike a bowling ball, you don't just jam your fingers in the holes. The grip is crucial. You're aiming for a secure hold, not a death grip. Think of it like shaking someone's hand – firm, but not crushing. Your fingers should wrap around the handle, with the base of the handle resting in the meaty part of your palm. Don't let it sit up in your fingers, or you'll be dealing with wrist pain later. It's like trying to hold a heavy suitcase by the handle with just your fingertips - not a good idea.
A good grip isn't about squeezing as hard as you can, it's about engaging your forearm muscles to keep the kettlebell stable. This also helps protect your wrists. Imagine your hand is a hook, and the kettlebell is hanging from it. That's the kind of connection you're after. You want to feel in control, not like you're wrestling a wild animal.
Hand Placement: Finding Your Sweet Spot
Now, where exactly on the handle should your hand go? For most exercises, you want your hand to be pretty much in the center of the handle. This gives you the best balance and control, especially when you're starting out. If your hand is too far to the side, the kettlebell will feel wobbly and harder to manage. It's like trying to carry a bucket of water when the handle is on the edge - you'll spill it everywhere.
There are some exercises where you might adjust your grip slightly, but for now, let's stick to the basics. Center grip is your friend. A good way to check is to hold the kettlebell at your side. The handle should feel balanced, and your wrist should be straight, not bent at an awkward angle. Think of it like holding a hammer, you want the handle to be an extension of your arm.
The Importance of a Neutral Wrist
This is a big one, and something people often miss. A neutral wrist means your wrist is in line with your forearm. You don't want it bent forward or backward. This is super important for preventing injuries. When your wrist is bent, you’re putting a lot of stress on the joints and tendons, which can lead to pain and problems down the road. Imagine trying to write with a pen held at a weird angle - it's not going to work well.
Think of your arm and wrist as a straight line. You want the force to travel through that line, not bend around a corner. It's like driving a car on a straight road versus a curvy one, you have much better control when it's straight. Keep your wrist neutral and your grip solid, and you'll be setting yourself up for success with kettlebells. Trust me, your wrists will thank you later.
Here is a quick recap:
- Grip the handle firmly, not a death grip.
- Center your hand on the handle.
- Keep your wrist straight and neutral.
The 6 Best Basic Kettlebell Exercises for Beginners
The 6 Best Basic Kettlebell Exercises for Beginners
Alright, now that we’ve got the grip down, let's get into the fun part: the actual exercises. I'm not going to throw a bunch of complicated moves at you. We're keeping it simple, effective, and beginner-friendly. These six exercises are like the foundation of your kettlebell journey. They'll work your whole body, build strength, and get you comfortable with the movement patterns. Think of it like learning the alphabet before you write a novel, you need to know the basics first. These moves are your A, B, Cs of kettlebell training.
I've picked these particular exercises because they are relatively easy to learn, but still pack a punch. They’ll help you improve your coordination, build strength, and get your heart rate up. We're hitting all the major muscle groups, so you'll get a full-body workout in a short amount of time. And don't worry, I'll walk you through each one step-by-step, so you know exactly what to do. Let's start with the first exercise.
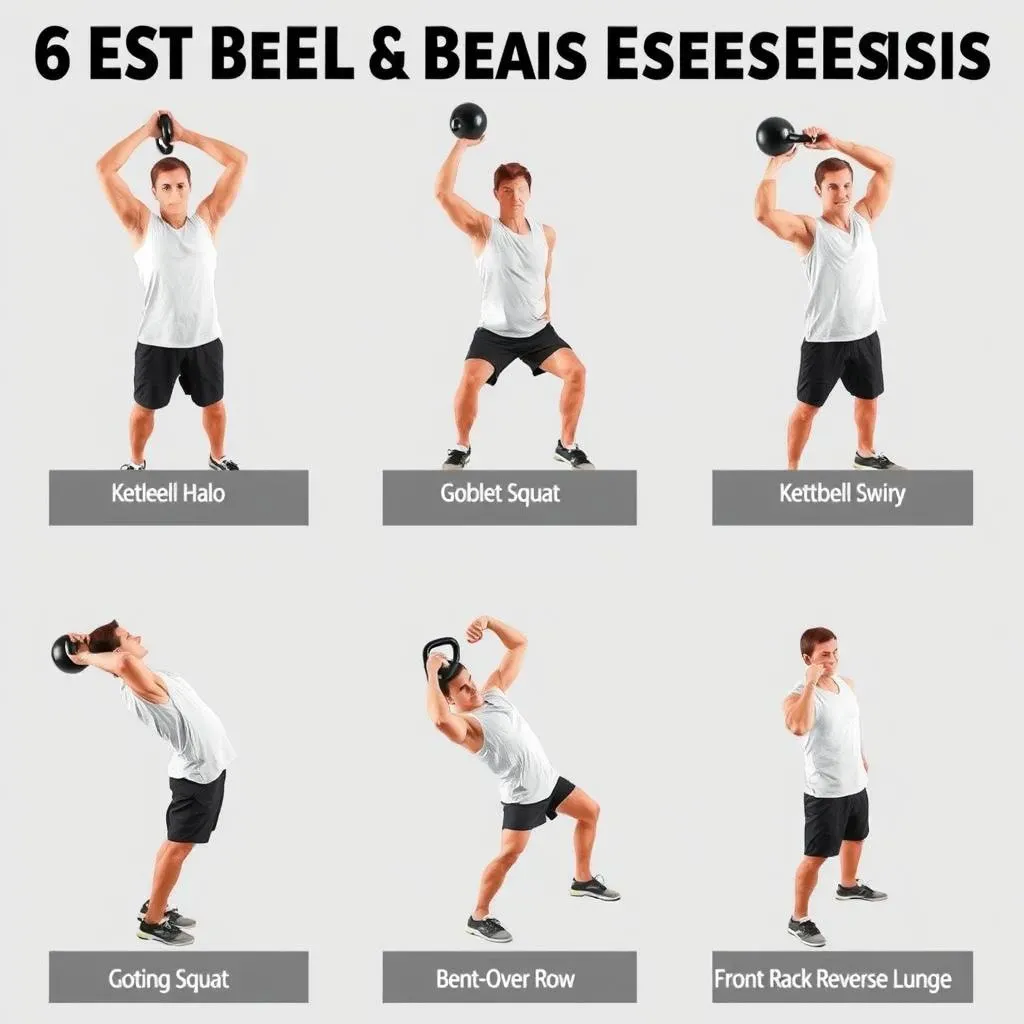
1. The Kettlebell Halo
The Kettlebell Halo is a great way to warm up your shoulders and get them ready for more intense exercises. It’s like giving your shoulders a gentle massage before the real work begins. To do it, hold the kettlebell by the handle with both hands. Keep your arms slightly bent. Now, slowly move the kettlebell around your head in a circular motion, like you're drawing a halo. Make sure to keep your core engaged, and try to keep your head still. I always feel like a little ballerina doing this one, but it works!
This isn't a race; go slow and controlled. You should feel a gentle stretch in your shoulders and upper back. If you feel any sharp pain, stop immediately. It’s better to do fewer reps with good form than a bunch with bad form. It is also a great exercise to improve your mobility. It's like oiling your joints before you start the engine.
Here is quick recap:
- Hold kettlebell by the handle with both hands
- Move the kettlebell in a circular motion around your head
- Keep your core engaged
- Keep your head still
- Go slow and controlled
2. The Goblet Squat
The Goblet Squat is a fantastic exercise for working your legs and glutes, and it also helps improve your core stability. It’s like a regular squat, but you're holding the kettlebell close to your chest, like you're hugging it. Stand with your feet shoulder-width apart, and hold the kettlebell by the horns (the sides of the handle) close to your chest. Keep your back straight, and squat down, as if you're sitting in a chair. Go as low as you can comfortably go, and then stand back up. It’s like you are giving the kettlebell a piggy back ride.
Make sure to keep your chest up and your core tight throughout the exercise. Don't let your knees cave in, and keep your weight in your heels. If you've never done a squat before, start with just bodyweight squats until you feel comfortable with the motion. Then add the kettlebell. This exercise is all about control and good form, and it is one of the most important exercises to master.
Here is quick recap:
- Hold the kettlebell close to your chest
- Stand with feet shoulder-width apart
- Squat down like you're sitting in a chair
- Keep your chest up and core tight
- Keep weight in your heels
3. The Kettlebell Overhead Press
The Kettlebell Overhead Press is a great exercise for building strength in your shoulders and upper body. It’s like you are pushing the kettlebell towards the sky. To do it, start by holding the kettlebell in one hand, in the front rack position (the kettlebell resting on the outside of your forearm, close to your shoulder). Keep your core engaged and your feet shoulder-width apart. Now, press the kettlebell straight up overhead, fully extending your arm. Lower the kettlebell back down to the starting position, and repeat. It’s like you are trying to reach for something on a high shelf.
Make sure to keep your core engaged and your back straight throughout the exercise. Don't let your back arch, and keep your wrist straight. You should feel the muscles in your shoulders and upper arms working. If you feel any pain in your shoulder, stop immediately. You may have to start with a lighter weight. This exercise is all about controlled movements and proper form.
Here is quick recap:
- Hold the kettlebell in the front rack position
- Keep your core engaged and feet shoulder-width apart
- Press the kettlebell straight up overhead
- Lower the kettlebell back down to the starting position
- Keep your core engaged and back straight
4. The Kettlebell Swing (or Romanian Deadlift)
Now, this one is where things start to get interesting. The Kettlebell Swing is a dynamic exercise that works your whole body, and it’s a great way to build power and burn calories. However, if you are not comfortable with the swing just yet, you can do the Romanian Deadlift instead. It’s like a gentler version of the swing, focusing more on your hamstrings and glutes. For both, stand with your feet shoulder-width apart, and hold the kettlebell with both hands in front of you. Now, hinge at your hips, pushing your butt back, and let the kettlebell swing between your legs. Then, swing the kettlebell up to about chest height, using your hips and glutes for power. It’s like you are trying to launch the kettlebell forward, but you are doing it with your hips.
If you are doing a Romanian Deadlift, you will hinge at your hips, keeping your back straight, and lower the kettlebell towards the ground, you will feel a stretch in your hamstrings, then stand back up, using your glutes. The most important thing is to keep your back straight and your core engaged throughout the exercise. Don't let your back round, and don't use your arms to lift the weight. It’s all about the hips and glutes for the swing, and hamstrings and glutes for the deadlift. You should feel the muscles in your glutes and hamstrings working. If you feel any pain in your lower back, stop immediately.
Here is quick recap:
- Stand with feet shoulder-width apart, holding the kettlebell with both hands
- Hinge at your hips, pushing your butt back
- Swing the kettlebell between your legs
- Swing up to chest height using your hips and glutes (for swing)
- Lower the kettlebell towards the ground and feel the stretch in your hamstrings (for deadlift)
- Keep your back straight and core engaged
5. The Bent-Over Row
The Bent-Over Row is a great exercise for working your back and biceps. It's like you are trying to pull the kettlebell towards your chest, and it’s like you're starting a lawnmower. To do it, stand with your feet shoulder-width apart, and hinge at your hips, bending forward until your back is almost parallel to the ground. Hold the kettlebell in one hand, and let it hang down towards the floor. Now, pull the kettlebell up towards your chest, squeezing your shoulder blades together. Lower the kettlebell back down to the starting position, and repeat. It’s like you’re trying to row a boat, but with a kettlebell.
Make sure to keep your back straight and your core engaged throughout the exercise. Don't let your back round, and keep your elbow close to your body. You should feel the muscles in your back and biceps working. If you feel any pain in your lower back, stop immediately. This exercise is all about controlled movements and proper form. Think of it as your back's way of saying, "Thanks for the workout!".
Here is quick recap:
- Stand with feet shoulder-width apart, and hinge at your hips
- Bend forward until your back is almost parallel to the ground
- Hold the kettlebell in one hand
- Pull the kettlebell towards your chest, squeezing your shoulder blades
- Lower the kettlebell back down to the starting position
- Keep your back straight and core engaged
6. The Front Rack Reverse Lunge
The Front Rack Reverse Lunge is a great exercise for working your legs and glutes, and it also helps improve your balance and coordination. It’s like you are doing a lunge, but with a kettlebell held in the front rack position. To do it, hold the kettlebell in one hand, in the front rack position. Keep your core engaged, and step back with one leg, lowering your body until your front knee is bent at a 90-degree angle. Make sure to keep your front knee over your ankle, and your back knee just above the ground. Now, push back up to the starting position, and repeat. It’s like you are doing a curtsy, but with a kettlebell.
Make sure to keep your core engaged and your back straight throughout the exercise. Don't let your front knee cave in, and keep your weight in your front heel. You should feel the muscles in your legs and glutes working. If you feel any pain in your knees, stop immediately. This exercise is all about controlled movements and proper form, and it is a great way to improve your balance.
Here is quick recap:
- Hold the kettlebell in the front rack position
- Keep your core engaged
- Step back with one leg, lowering your body
- Keep your front knee over your ankle
- Push back up to the starting position
- Keep your core engaged and back straight
Choosing the Right Kettlebell for Your Basic Workout
Choosing the Right Kettlebell for Your Basic Workout
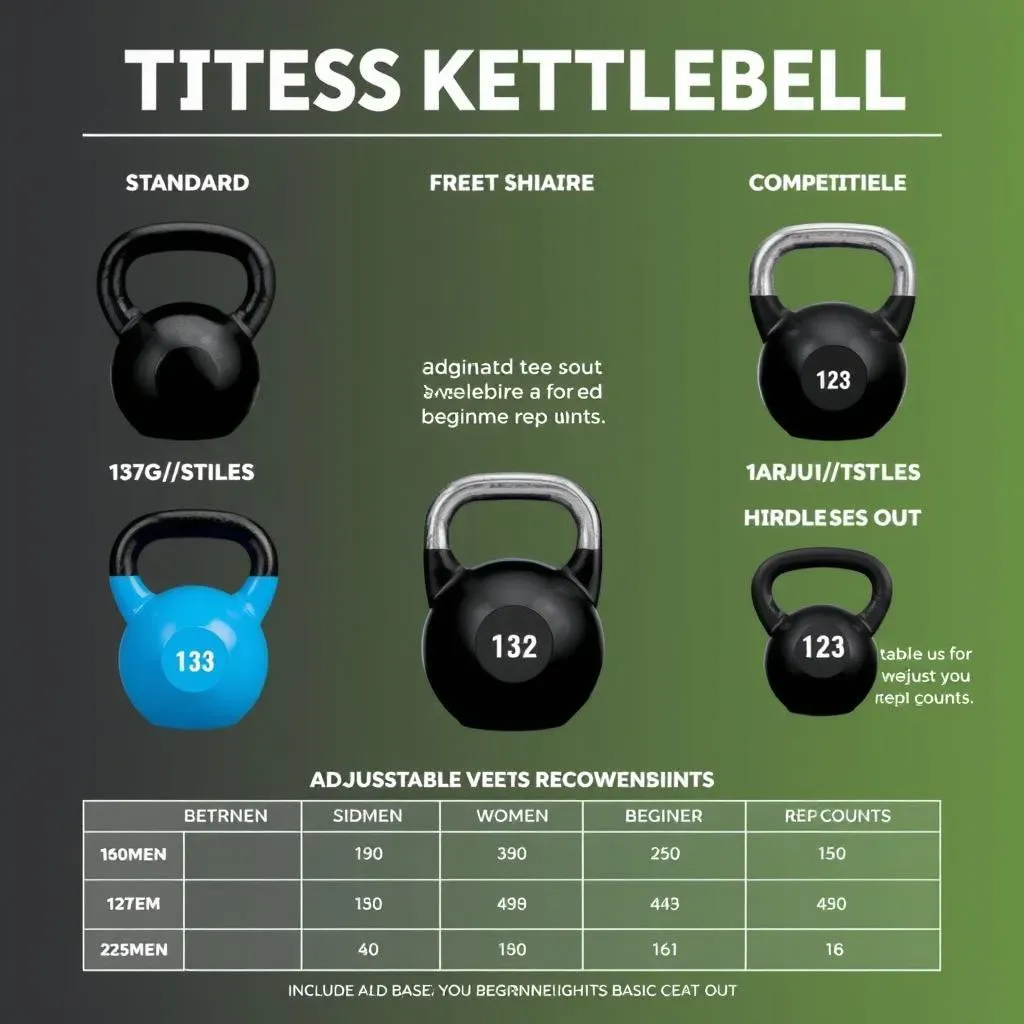
Types of Kettlebells: What's the Deal?
Okay, so you're ready to get your kettlebell on, but then you see there's more than one type and you're like "Wait a minute, what do I do?". Don't worry, it's not as complicated as it looks. Basically, you've got three main contenders: the standard kettlebell, the competition kettlebell, and the adjustable kettlebell. The standard one is like your classic, everyday kettlebell. It’s usually made of cast iron and has a pretty wide handle. It's great for home use and it's usually the most affordable option. Then you have the competition kettlebell, it's a bit more fancy. It's made of steel and has a handle that is more uniform in size, no matter the weight of the kettlebell. This makes it better for advanced moves and things like juggling, if that's your thing. Finally, there's the adjustable kettlebell, it's like a transformer. It has a mechanism that allows you to add or remove weight. This is awesome if you want to save space or try out a bunch of different weights without buying a ton of kettlebells. It’s like having your own little gym in one package.
So, which one should you choose? Well, for a beginner, I'd say start with a standard kettlebell. They're usually the most budget-friendly and do the job perfectly for basic exercises. Once you get more comfortable, you can explore the other options. It's like learning to drive a regular car before you try a race car.
Kettlebell Weight: Not Too Heavy, Not Too Light
Choosing the right weight is crucial. You don't want to pick something that's way too heavy, because you'll be sacrificing your form and risking injury. On the flip side, if it's too light, you won't get much benefit from the workout. It’s like Goldilocks and the Three Bears, you want it just right. As a general guideline, most men start with a 16kg (35lbs) kettlebell, and most women start with a 12kg (25lbs) kettlebell. But that's just a starting point. If you're already pretty strong, you might need to go heavier, and if you're new to exercise, you might need to go lighter. It’s all about finding that sweet spot.
The best way to figure out the right weight is to try it out. If you can do the exercises with good form for 8-15 reps, that's a good sign. If you're struggling to complete even a few reps, it's probably too heavy. If it feels too easy, it's probably too light. Don't be afraid to experiment a little. It’s like finding the perfect pair of shoes, you might need to try a few before you find the right fit.
Beginner Level | Weight For Men | Weight For Women |
|---|---|---|
Starting Weight | 16kg (35 lbs) | 12kg (25 lbs) |
Adjust if: | You can do more than 15 reps easily. | You can do more than 15 reps easily. |
Adjust if: | You can't do 8 reps with good form. | You can't do 8 reps with good form. |
Other Things To Consider
Besides weight and type, there are a few other things you might want to think about. The handle of the kettlebell should be comfortable for your hands. You don’t want it to be too rough or too slippery. Some kettlebells have a powder coating that can be a bit grippier, while others are just plain cast iron. Also, take a look at the shape of the handle. Some are more rounded, while others are a bit flatter. Choose the one that feels best in your hand. It’s like picking a pen, some feel better to write with than others.
And finally, think about the space you have. If you're working out at home, you might want to consider an adjustable kettlebell to save space. If you have a gym, you might have a wider variety of options. The most important thing is to choose a kettlebell that you are comfortable with and that you enjoy using. It’s like choosing a hobby, you're more likely to stick with it if you enjoy it. So, take your time, do your research, and choose a kettlebell that will help you reach your goals.
Basic Kettlebell Workout for Beginners: A 20Minute Routine
Basic Kettlebell Workout for Beginners: A 20Minute Routine
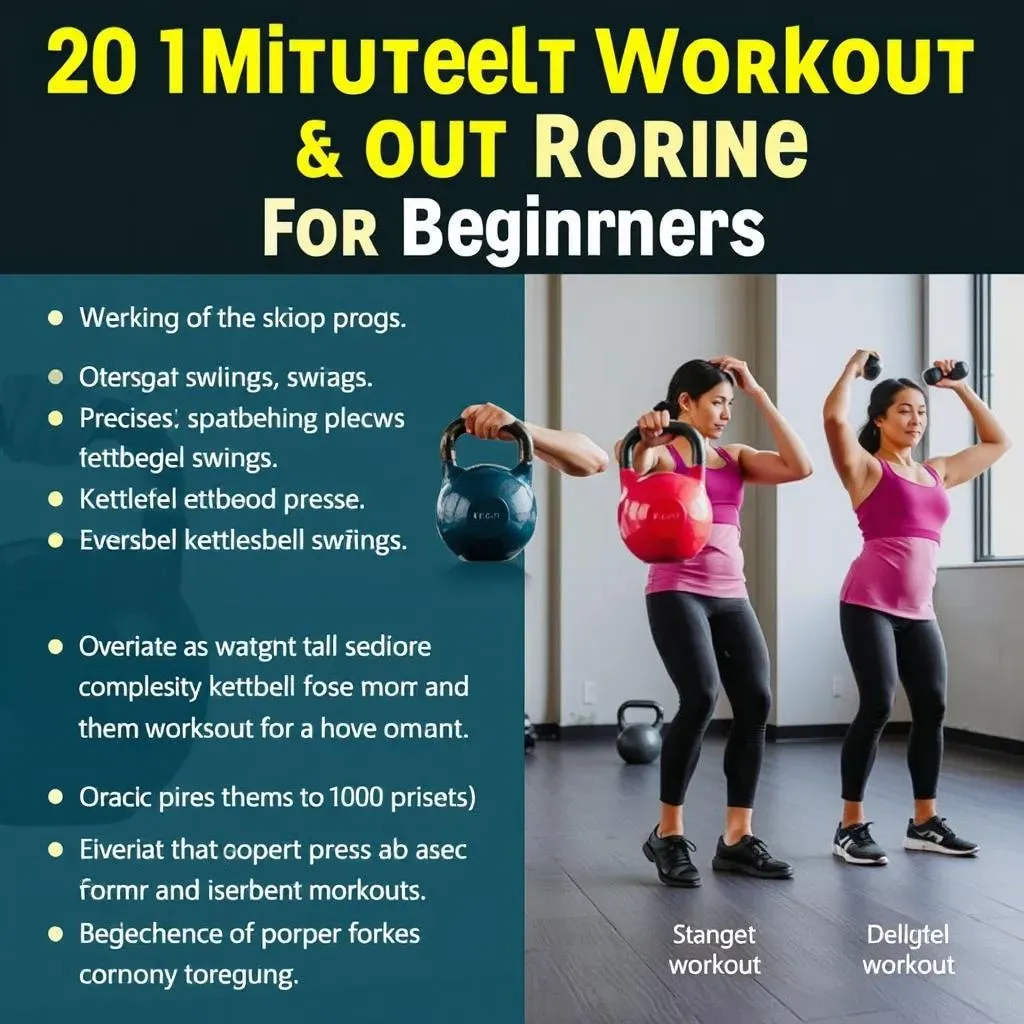
Getting Started: Your 20-Minute Circuit
Okay, so you've learned how to hold a kettlebell, you've seen the best basic moves, and you've even picked out your perfect kettlebell. Now, let's put it all together into a killer 20-minute workout. This routine is designed to be simple, efficient, and effective. It’s not about spending hours in the gym, it’s about making the most of the time you have. We're going to use a circuit format, which means you'll go through each exercise one after the other, with minimal rest in between. Then you'll take a slightly longer break and do it all again. It’s like a fun little fitness rollercoaster. You will repeat the circuit 3 times, and your body will thank you for it.
Remember, the key here is to focus on good form over speed. It’s much better to do fewer reps with perfect form than a bunch of reps with sloppy form. Think of it like building a house, you need a solid foundation first, or it's going to crumble down. This workout is your foundation for kettlebell training. So, take your time, listen to your body, and most importantly, have fun!
The Workout: Step-by-Step Guide
Here's how the 20-minute workout breaks down. You'll do each of the following exercises for 8-15 repetitions, and then move onto the next one. Once you've finished all six exercises, you'll take a 1-2 minute rest, and then you’ll do the entire circuit again. You will repeat this circuit 3 times in total. It’s like a mini-marathon, but with kettlebells. If you find that 15 reps is too much, you can start with 8 reps and work your way up. If you need to take a break between exercises, do it, but try to keep the rest to a minimum. Remember, this is your workout, so do what feels right for you. It’s like cooking, you might need to adjust the recipe to your liking.
Here's a quick recap of the workout:
- Kettlebell Halos: 8-15 reps
- Goblet Squats: 8-15 reps
- Kettlebell Overhead Presses: 8-15 reps per side
- Kettlebell Swings (or Romanian Deadlifts): 8-15 reps
- Bent-Over Rows: 8-15 reps per side
- Front Rack Reverse Lunges: 8-15 reps per side
- Rest: 1-2 minutes
- Repeat the circuit 2 more times
Cool Down and Listen To Your Body
After you've completed your three circuits, it's important to cool down and stretch your muscles. This will help prevent soreness and improve your flexibility. It’s like a cool drink after a workout, it’s refreshing and helps you recover. You can do some light cardio, like walking, and then stretch your major muscle groups, like your legs, back, and shoulders. Hold each stretch for 20-30 seconds, and focus on breathing deeply. It's like a little reward for all your hard work.
Remember, consistency is key to seeing results. Try to do this workout 2-3 times a week, and you'll start to notice improvements in your strength, endurance, and overall fitness. Don't be afraid to modify the workout to fit your needs. If you need to use a lighter weight, do it. If you need to take more breaks, do it. The most important thing is to listen to your body and make sure you are staying safe. It's like taking care of a plant, you need to give it the right amount of water, sunlight, and attention to help it grow.